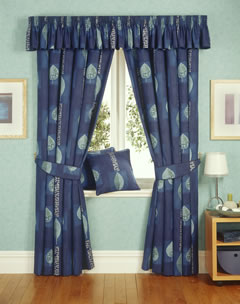
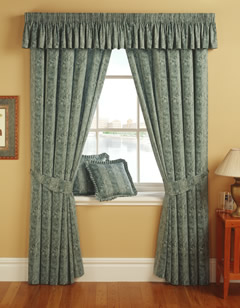
A separate project described how building a window cornice can raise standard window treatments to a new decorating level by adding texture, color, and depth to walls and solving problems caused by windows or window moldings that are too small for the proportions of a room. In this project, you'll cover your creation with a fabric of your choice.
Materials List Fabric Polyester batting (padding) Tape measureScissorsStaple gun with ¼ staplesSmall standard screwdriverHammer
1. Cut Polyester Padding:Measure and cut batting large enough to wrap the front and sides as well as the top, bottom, and back edges with a few inches extra length and width.
2. Install the Padding: Lay the cornice face-down on the batting and pull the batting taut as you staple it to the back side of the cornice all around its perimeter. Use a minimum of one layer.
Tip: If you want more plush padding, begin by stapling one or more layers to the faces only (don't wrap), and finish with a wrapped layer as just described. Trim any excess batting.
3. Cut the Fabric: Cut the fabric oversized as you did the batting in Step 1. You need plenty of extra material to extend from the top of the dust cover, around the face of the cornice, and up to the dust cover on the underside, plus about 4 inches to grasp when you pull the fabric taut in the next step. Lay the fabric right-side-down on a clean, flat surface, and place the cornice on top of it.
4. Install Preliminary Staples and Check Your Work: Wrap the fabric over the top edge of the cornice and drive several staples in the middle (about 1 inch apart); then pull the fabric around the bottom so it is just taut (don't stretch it) and drive several staples directly opposite the top staples. Do the same for the sides. Turn the cornice over to check that you have not distorted the fabric. Pry out staples with a small standard screwdriver if it's necessary to rework the material.
5. Complete Stapling: Add several staples to the left and right of the first ones you put in, then go to the opposite side, pull it taut, and again staple opposite the ones you just put in. Work your way back and forth in this way along the length of the cornice until you get to the ends. Do some careful (neat) folding and cut fabric as necessary to make the inside corners look neat. Add a few staples to the sides as needed and cut off any excess material.
Tip: Hammer in any staples that are not fully seated against the fabric.
6. Reinstall the Cornice: Place the cornice against the wall so it fits around the braces you installed when making the cornice. The dust cover should rest on top of the top casing.