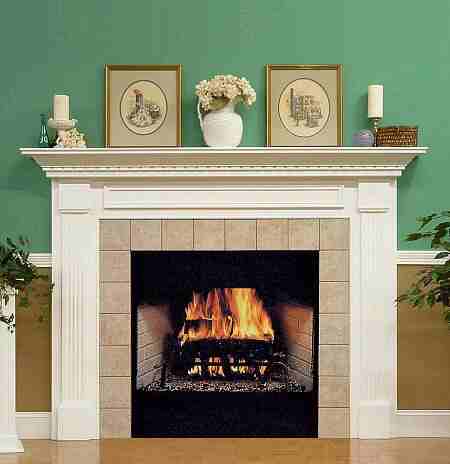
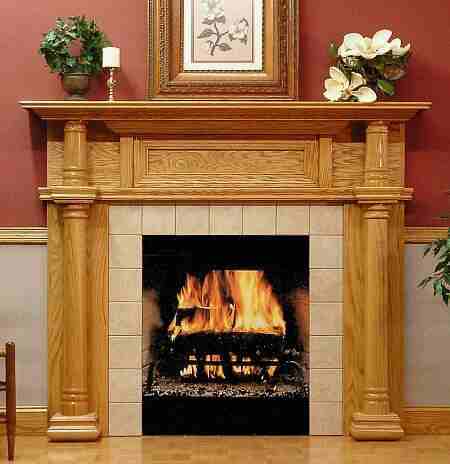
A fireplace is usually just a black hole in the wall until it is framed by decorative elements called a surround and mantel. The mantel makes the fireplace a focal point and sets the style for a room. If you have recently installed a zero-clearance fireplace or want to change the style of an existing masonry fireplace, you have two options: using a mantel kit or building one yourself.
A mantel kit usually comes partially assembled with a surround that you can cut to suit the dimensions of your fireplace. If you have the skills and tools, you can design and build a mantel from premium boards and either stock or custom-milled moldings. Here are the basics for building a fireplace mantel using either of these two options.
Before you buy or design a fireplace mantel, check with your local building department for important fire-safety guidelines specifying required side and top clearance between a fireplace opening and any combustible materials.
1. Plan the Mantel: Take accurate measurements and make a sketch of the fireplace. Drill pilot holes to determine what solid backing (if any) is behind the wall where the mantel will be installed. Choose a suitable size and style mantel, or design your own mantel making scaled working drawings. Tip: Buy samples of available moldings so you know what you have to work with. Cut and assemble short, cross-section models of the sides, frieze board, and mantel shelf with a hot-melt glue gun to help you visualize the design and determine nailing and fastening requirements.
2. Install Noncombustible Surround: Masonry fireplaces will already have brick or stone around the immediate firebox opening. To give a zero-clearance fireplace a more traditional look, you may want to install tile, veneer stone or brick, or another noncombustible surround material around the immediate firebox opening. Most of these materials are simply adhered to the wall with the appropriate adhesive and the joints are grouted. Cutting is usually done with a wet saw, which is a safe, easy-to-use rental tool. 3. Mill Custom Moldings: If you have a well-equipped workshop with a table saw, a router, and power sanders, you can mill moldings to imitate or duplicate ones that you've seen in a book or magazine. Use only the best woods and very sharp blades and bits. Progressively sand your molding with papers from 80- to 400-grit that are wrapped over foam blocks that have be cut to duplicate the molding's profile.4. Attach the Wood Surround: Attach the wood surround to the wall using construction adhesive and the appropriate fasteners. If possible, locate fasteners where they will be covered by subsequent moldings. Countersink and later fill all holes that are not covered.5. Build Up Molding: Take precise measurements and don't forget: "Measure twice and cut once." A professional-quality miter box or, preferably, a 10-inch power miter saw are required for the precision miters and crosscuts. Both are available at tool rental outlets.Tip: Glue all joints but be sure to wipe off all excess glue with a damp cloth, especially if you plan to stain the wood. Glue will prevent proper staining.
6. Apply Finish: After a final sanding, meticulously clean the surface with a tack cloth. Mask the wall and other adjoining surfaces that are not being finished. Brush or wipe on stain, smooth the surface with steel wool, and apply at least three coats of polyurethane or another clear protective coating. If you prefer a painted finish, apply a paint primer, lightly sand with very fine sandpaper, and apply two or more coats of trim enamel.
Materials ListMantel kit, or boards and moldings Hot-melt glue gun Router, table saw, power sanders Safety glasses
Noncombustible Surround: Tile, stone, or other surround material Suitable cutting and installation tools Adhesive, mortar, grout, or other installation materials
Mantel Installation: Tape measure Combination and framing squares Miter box or 10-inch power miter saw Finishing nails and other fasteners Hammer and nail sets Drill/driver, bits, drills, countersinks, and other accessories Sandpaper (80-, 120-, 220-, and 400-grit) Rubber sanding block Caulk, glue, and construction adhesive